Master Frontend Code Generation in Visual Studio Code: A Step-by-Step Guide for AI Coders.
Mirek Maruszewski
GitHub Copilot, a handful of prompts, and 20 minutes: that's all you need to create a basic website. I'm Mirek Maruszewski, a Front-end Developer at hero/dot, and I've put together a simple worksheet to help you grasp AI code generation from a front-end standpoint. Follow along as I walk you through maximizing AI's potential in our everyday tasks.
This article is part of the Decoding AI series by hero/dot, which focuses on showcasing the practical aspects of Artificial Intelligence and its impact on the future of business and IT. Decoding AI stems from our commitment to keeping up with the latest technological advancements. In monthly internal workshops, our team members share their experiences with different aspects of using AI in their daily work. We then condense that knowledge into helpful articles to share with you on our blog.
Last month, we delved into GitHub Copilot alongside Dima Bohynskyi and his cat image generator. Today, we're approaching this topic from a different angle. A big shoutout to Mirek Maruszewski, our skilled Front-end Developer, who offered to share his insights and guide us through the process of website creation. In this article, Mirek will cover:
- An introduction to GitHub Copilot and its key functions.
- A useful list of GitHub Copilot hotkeys.
- A step-by-step worksheet for crafting a basic HTML website with CSS in Visual Studio Code using the Copilot extension.
- 6 valuable tips drawn from his own experiences.
Ready? Let Mirek lead the way!
GitHub Copilot: Your AI Coding Assistant
GitHub Copilot serves as an AI code generator and assistant for developers, aiming to aid them in their daily tasks. Widely regarded as the best AI coding tool, Copilot stands out for its adaptive learning and natural language comprehension abilities. Its proficiency across various programming languages and integration directly within code editors makes it invaluable for both seasoned developers and novices alike.
For a more in-depth introduction to GitHub Copilot, check out Dima's article on the subject. Here, I'll briefly cover Copilot's key features before diving into practical applications.
- Code Generation: Copilot can generate code based on natural language prompts, ranging from writing code snippets to complete functions.
- Code Completion: Intelligent code suggestions from Copilot can significantly speed up developers' workflows.
- Code Explanation: Using the "/explain" command provides comprehensive explanations, useful for documentation.
- Programming Language Translation: Copilot's AI model, trained on vast open-source code datasets, enables proficiency across programming languages.
- Debugging: The "/fix" command helps identify and refine code issues.
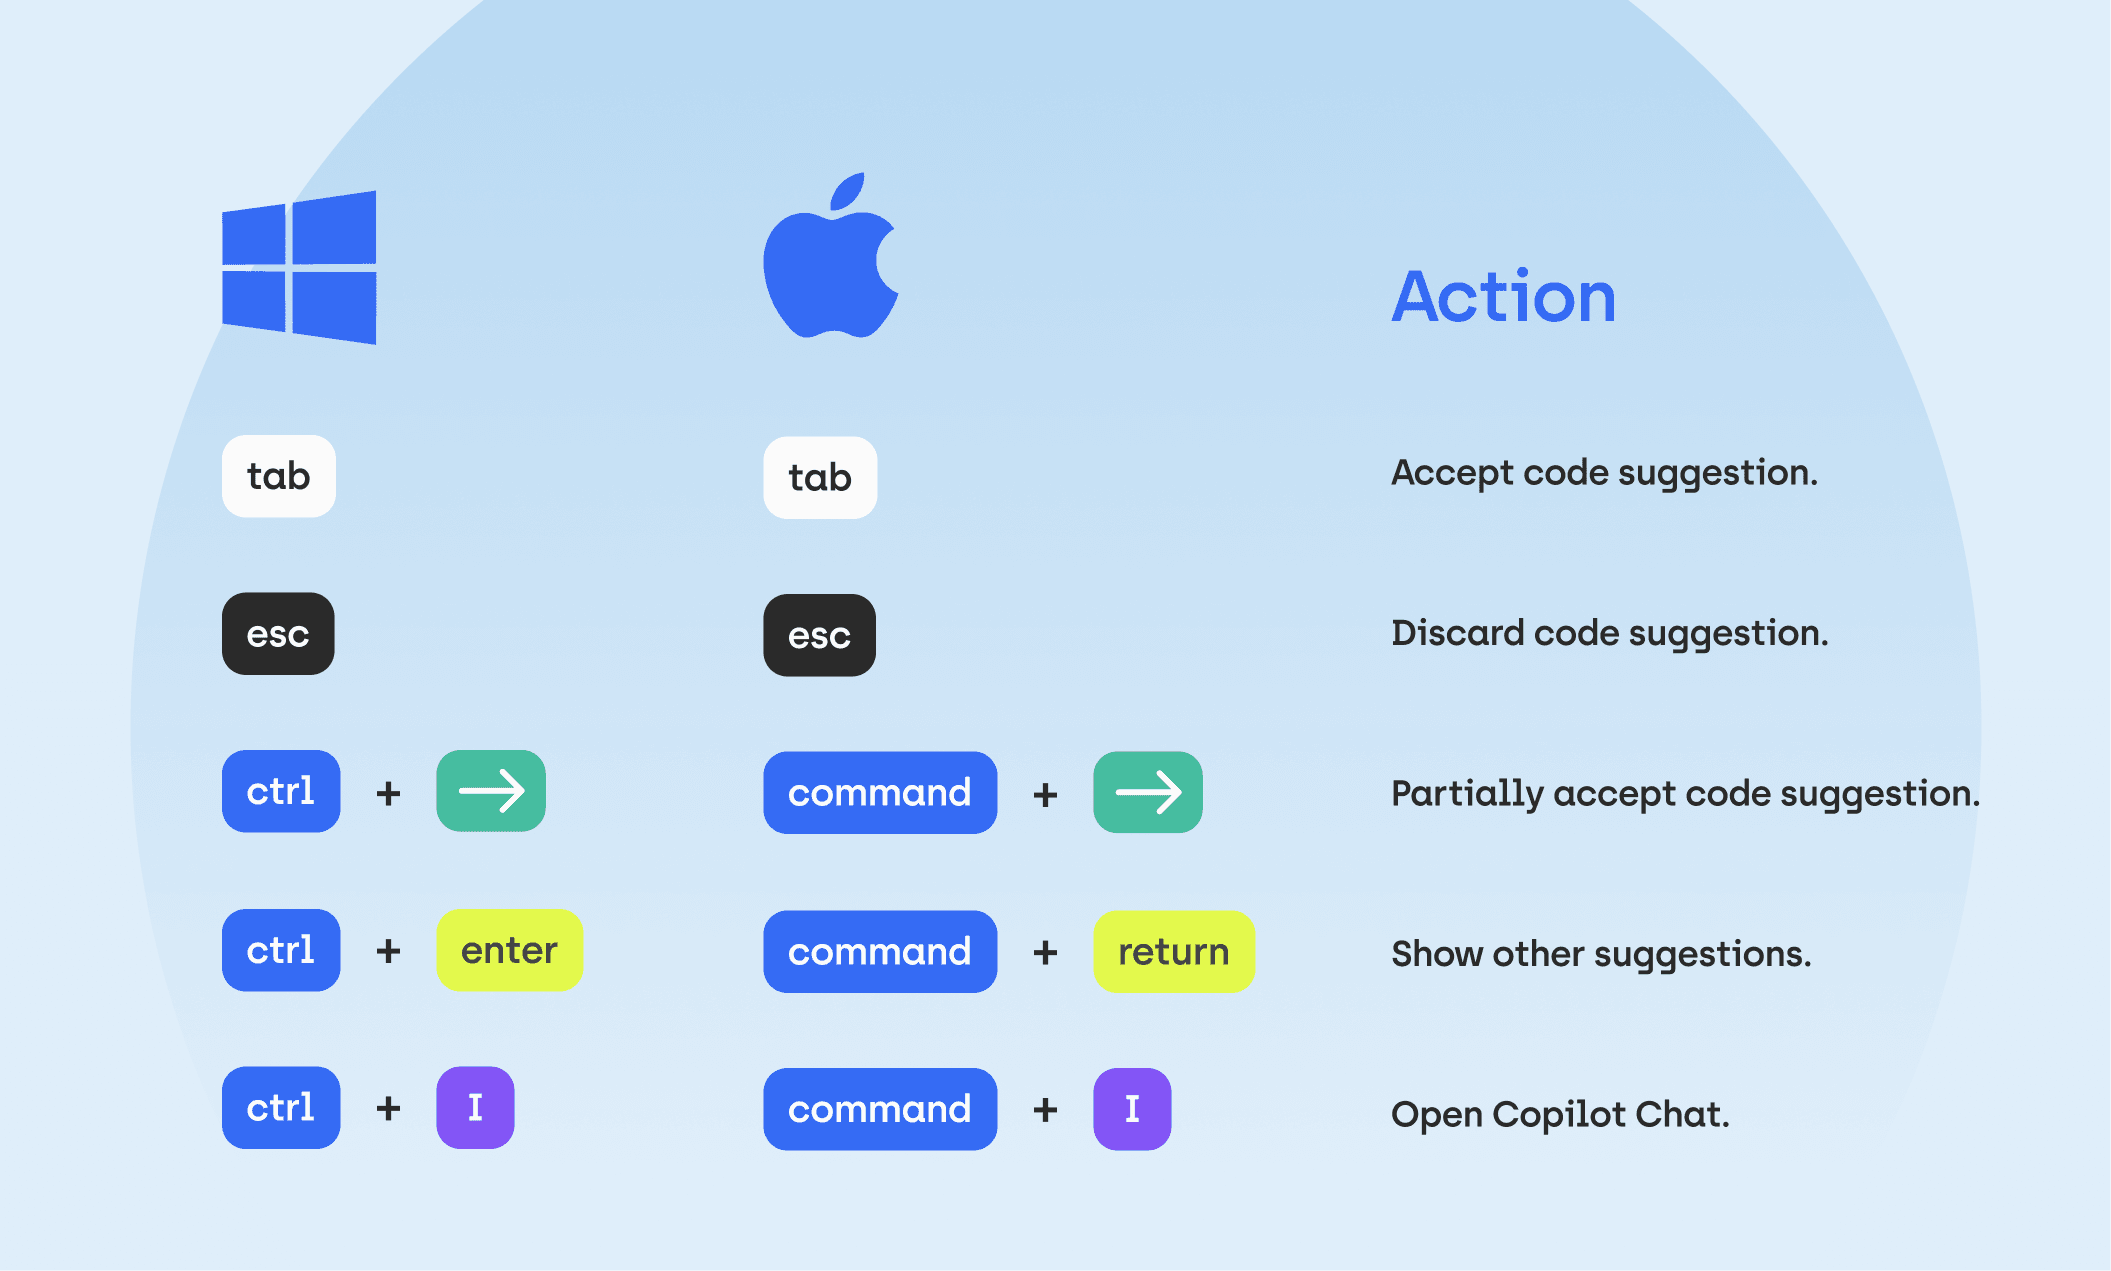
GitHub Copilot Hot Keys
To further enhance your GitHub Copilot experience, here are some essential hotkeys I use daily:
- Tab: Accept code suggestion.
- Esc: Discard code suggestion.
- Command/Ctrl + →: Partially accept code suggestion.
- Command/Ctrl + Enter: Show other suggestions.
- Command/Ctrl + I: Open Copilot Chat.
Building a Website with GitHub Copilot
Let's now dive into the practical aspect of this article. Our goal is straightforward: create a basic HTML website with CSS using only prompts and the power of artificial intelligence. I've put together a simple step-by-step worksheet for beginners in this topic; feel free to follow along in Visual Studio Code. Although we'll be using the same prompts, keep in mind that your AI coding assistant may produce different and unique results – that's just how generative AI operates.
Before we begin, one important note: in our day-to-day tasks as frontend developers, we typically don't rely on AI to generate entire functions or complex code structures. Instead, we tend to accept relevant code snippets and incorporate them into our projects. This guide aims to showcase the extent of GitHub Copilot's capabilities in frontend development, and should not be interpreted as a call to blindly adopt whatever AI suggests. So, without further delay, let's get started!
Phase One: Boilerplate Code Generation
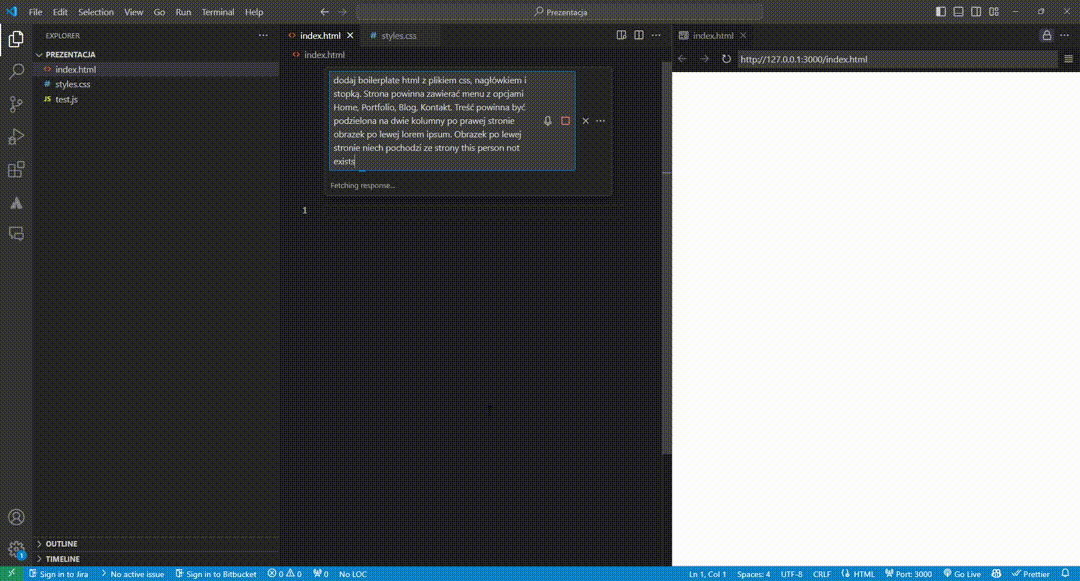
First things first: the setup. We'll be working in Visual Studio Code with two files: index.html and styles.css. To kick off the software development process, we need to generate some boilerplate code. In the index.html file, press Command + I to bring up the Copilot Chat typing bar. From there, you can write or paste your first prompt. Ensure it covers the following aspects:
- Objective: What goal are you aiming to achieve?
- Programming languages: Which languages do you prefer?
- Website building blocks: What sections should be on the main page? What subpages should be included in the menu bar? What components should the AI use (text boxes, images, buttons)?
- Layout: How should components be positioned? What goes on the right, what goes on the left, etc.?
- Sources: Are there any external sources Copilot should utilize?
Here's the prompt I've written:
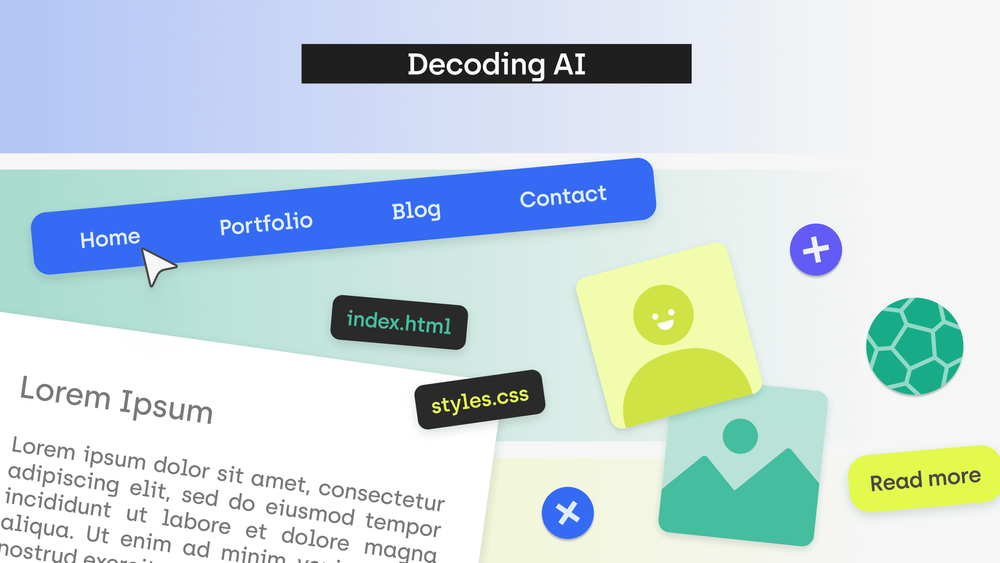
Add HTML boilerplate code with a CSS file, a header, and a footer. The page should include a menu with options: Home, Portfolio, Blog, Contact. The content should be divided into two columns, with an image on the left and Lorem Ipsum text on the right. The image should come from the site thispersondoesnotexist.com.
Hit Enter, and within seconds, you'll receive the AI's response. Quickly review it to ensure it meets the requirements listed in the query. If so, click the Accept button below your prompt. If you spot any glaring mistakes, you can use the Discard button to try again with a different prompt, reload the response, or manually make corrections.
Tip #1
To view the results generated by AI in real-time, enable preview. Here's how: download and install this VS Code Extension. Then, locate your file on the Explorer bar on the left side of the screen, then click it using the left mouse or touchpad button. From the option list, choose Show Preview. Your website should appear on the right of the code editor. Adjust the width as needed.
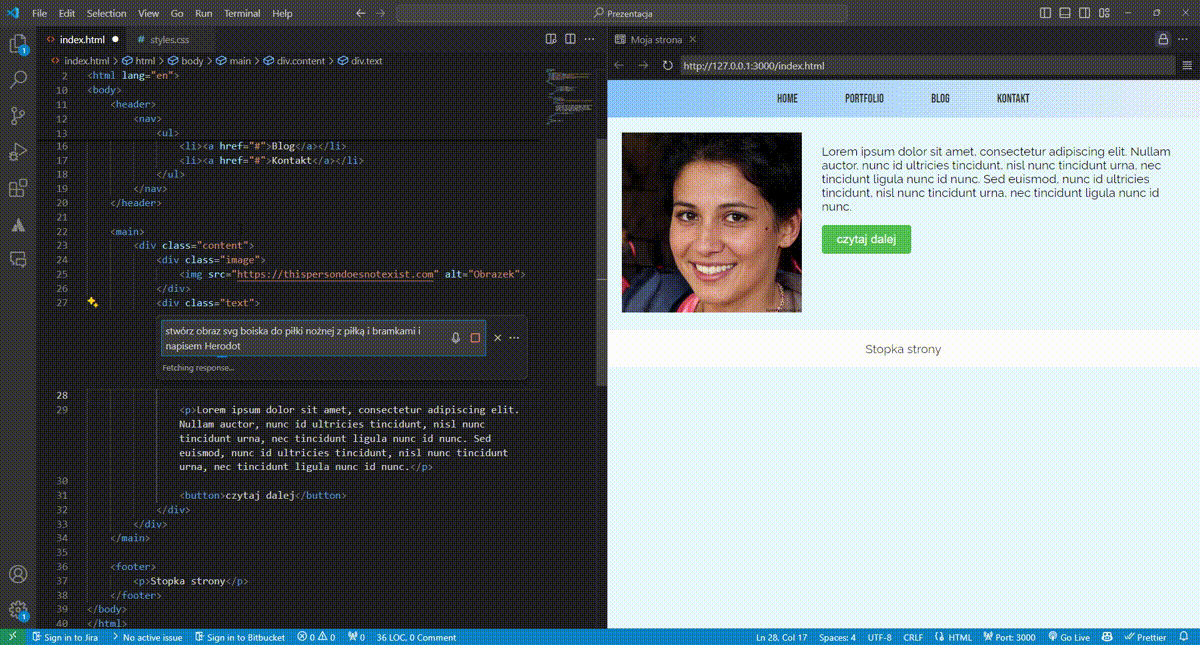
After completing this first phase, your website should resemble something like this:
Phase Two: Adding Styles
Step 1: General Styles
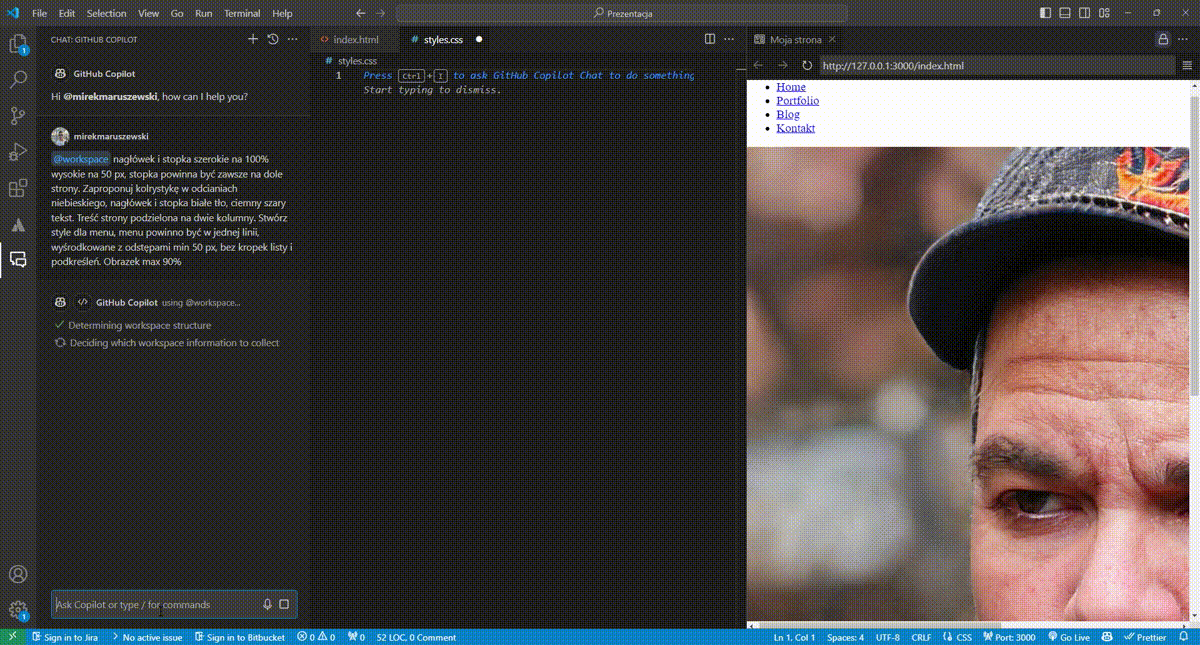
Now, let's apply styles to specific HTML elements in the boilerplate code. Switch over to the styles.css file and, using the same technique as previously, send the following prompt:
Generate styles for the website. Ensure that both the header and footer span the full width of the page and are 50 pixels in height. The footer should be positioned at the bottom of the page. Text within the header and footer should be displayed in dark gray against a white background. Style the menu so that it appears in a single line with spaces, without bullet points. Recommend a color scheme featuring shades of blue. Divide the page content into two columns. Additionally, limit the image size to a maximum of 100%.
As you might have noticed, the initial attempt with GitHub Copilot did not meet our expectations. This occurred because Copilot didn't consider the code previously written in the index.html file, as the prompt was entered in a separate file.
To ensure better results, let's give it another try, but this time using GitHub Copilot Chat on the left side of the screen. Open the chat by clicking the icon with two speech bubbles. Copy and paste the prompt into the typing bar, but this time, add @workspace at the beginning. By doing so, Copilot will take into account all open tabs, including our index.html file. Once you receive the generated code from the chat, paste it into the editor.
Voilà! We've managed to style our page successfully! Although, admittedly, the image link had to be corrected manually because Copilot mistakenly added '/image' to the link. Other than that, our page looks great!
Tip #2
When utilizing AI coding assistant tools, always pay attention to the provided context. Adding @workspace at the beginning of the prompt in GitHub Copilot chat ensures that all your open tabs will be considered in the response.
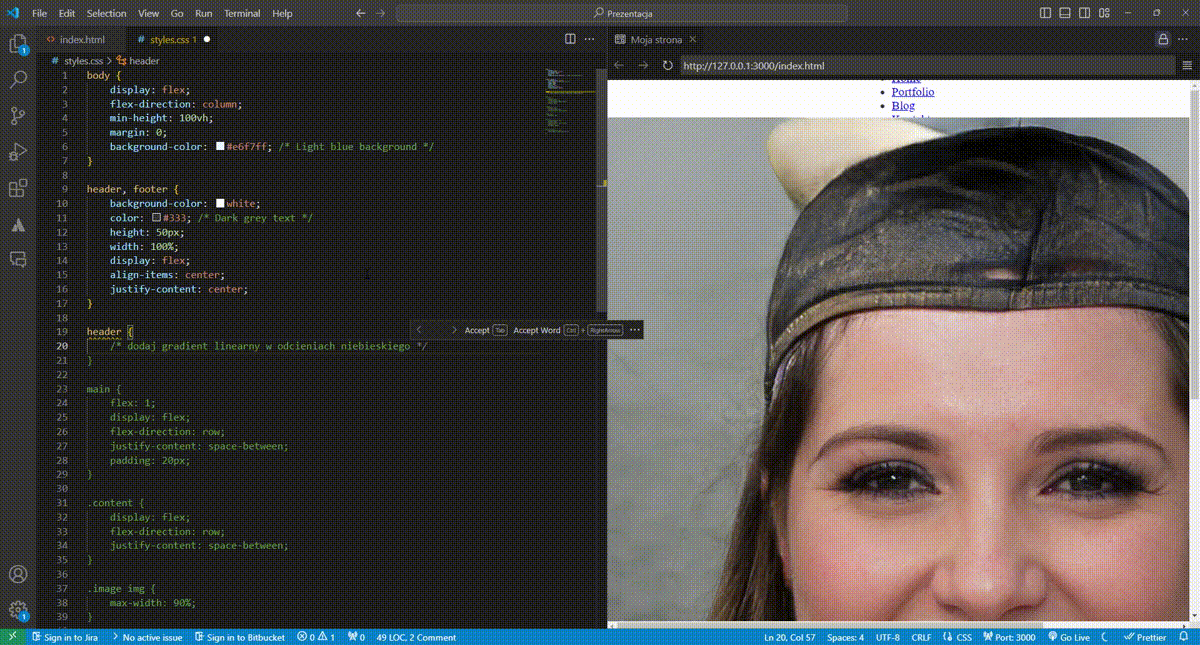
Step 2: The Header
In the next 3 steps, we will refine specific website components, starting with the header. In the styles.css file, input the prompt: "Apply a linear gradient in shades of blue" for the header class specified in the HTML code.
Unfortunately, our request didn't yield the expected outcome, as Copilot generated a rainbow gradient instead of a blue one. You can attempt to fix this by discarding the inadequate suggestion and experimenting with variations of the same prompt.
Tip #3
Precision is key when crafting prompts for AI coding assistants. Consider how you can make the prompt less ambiguous. For instance, providing specific HEX codes leaves no room for interpretation compared to describing "shades of blue".
Feel free to further refine the header styling. Why not try one of the following prompts?
Add a 0.5 second transition on hover. Make the header expand to a height of 100 pixels.
Add a 0.5 second transition on hover. Make the links in the menu highlight to white.
Step 3: Fonts
Now, let's focus on typography. If you have selected a couple of typefaces from Google Fonts, simply provide a brief prompt. GitHub Copilot will handle the rest, locating the appropriate API link online.
Include the Bebas Neue and Raleway typefaces from Google Fonts in the project.
Step 4: Button
Moving on to styling the button... Oh, but there isn't one? You can quickly switch to the HTML file and insert a "Read more" button below the Lorem Ipsum text – either manually or through AI code generation.
Upon returning to the CSS file, let's go completely against my previous tip and use a more general prompt: "Style the button". To my surprise, the button was transformed to better align with the website's aesthetic! Granted, this isn't a foolproof approach for every component, but it's remarkable how GitHub Copilot adapts to our coding style and produces results that complement the overall page design.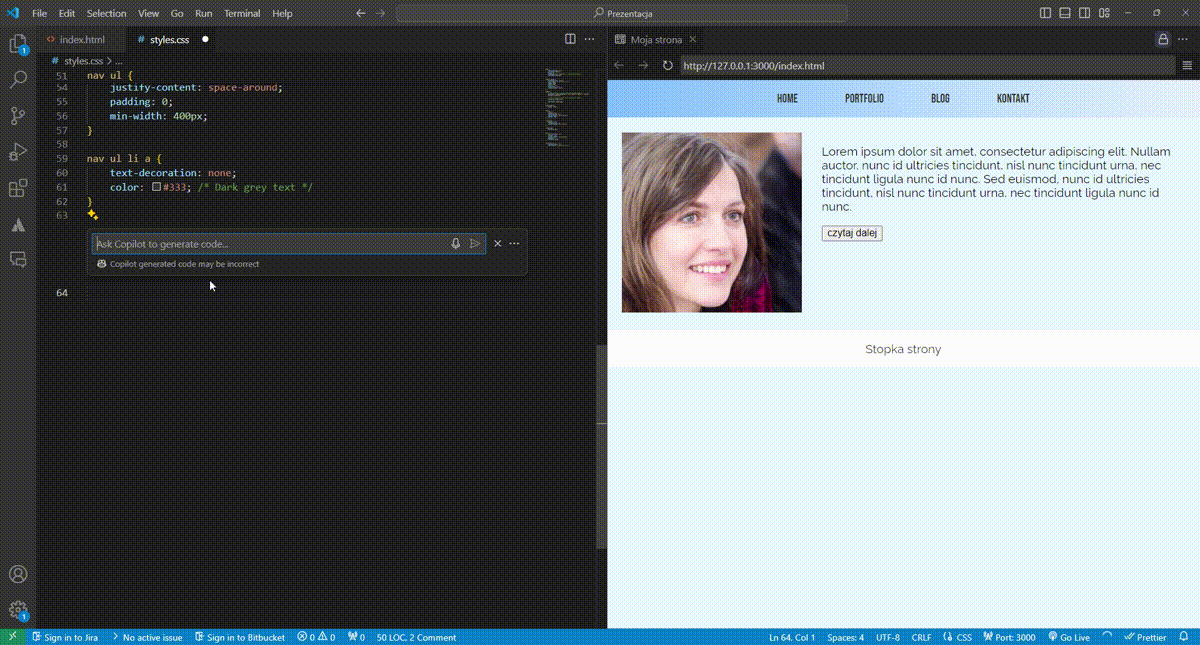
Tip #4
Always double-check GitHub Copilot's suggestions, as the tool may not always generate flawless, error free code. By either accepting or rejecting AI's responses, you're effectively instructing it on your coding preferences and style, while also establishing the standard for the desired level of code quality.
Phase Three: Illustrations and Animations
Step 1: Illustrations
Did you know that GitHub Copilot can create animations? But before diving into that, let's first generate an illustration to animate. Head back to the HTML file and input a short prompt:
Create an SVG image depicting a soccer field with two goal posts, a ball, and a hero/dot logo positioned at the center of the pitch.
Tip #5
To ensure accuracy, break down your prompt into several parts. First, describe the pitch as a green rectangle positioned horizontally. Then, specify the color, size, and position of the ball, and so on.
Why is this important? Because each subsequent token is generated based on previous outcomes. Let's take mathematical equations as an example. AI can't directly multiply larger numbers and will give incorrect answers if asked. However, there's a workaround. If you request it to solve the equation using the long method (with one-digit numbers), it'll likely arrive at the correct result. This is because the AI first multiplies two one-digit numbers and uses them as a basis for subsequent calculations, leading to the correct answer.
Step 2: Animations
Apologies for the (hopefully interesting) detour. Now, let's dive back into animating. Assign the SVG image of the ball the class "ball". Then, per usual, write a prompt in the CSS file:
Create an animation for the class 'ball' that moves it from left to right.
There you have it! Of course, there's always room for improvement, so feel free to tweak the animation by adjusting the tempo. Nonetheless, the outcome is remarkable:

Tip #6
Always consider the effect you aim to achieve. You are the source of creativity and innovation; AI is merely there to expedite your results.
Phase Four: Documentation
It's time for the final task in our worksheet. As a finishing touch, let's prepare code documentation. There are two methods to accomplish this.
The first method involves using the explain function. For instance, let's consider our "Read more" button. In the CSS file, highlight the class "button". Then, open Copilot Chat using Ctrl + I and type "/explain". The AI will provide detailed descriptions of every property associated with this class, which you can later incorporate into your documentation.
The second option involves typing "/doc" instead of "/explain". This prompts the AI to generate a documentation comment directly in the code editor.
Final Thoughts
Thanks for sticking around until the end of the article, and an even bigger shoutout to those who followed along and created a website with me. This little experiment has hopefully showcased the remarkable speed and results that AI coding tools can achieve, while also highlighting their occasional shortcomings. The lesson here is to use these AI tools responsibly and not blindly follow every suggestion they offer. With enough determination and practice, you too can proudly call yourself a seasoned AI coder!
More Articles From the Decoding AI Series
Need expert assistance with your digital project?
Recent from Mirek Maruszewski