Getting Started With GitHub Copilot

Dmytro Bohynskyi
GitHub Copilot is an invaluable AI pair programmer that offers code suggestions, generates entire functions, and even helps you develop... a cat image generator! I'm Dima Bohyński, a Python Developer at Tisa Group, here to demonstrate the capabilities of GitHub Copilot and share proven tips on how to use it effectively.
This article is part of the Decoding AI series by hero/dot, which focuses on showcasing the practical aspects of Artificial Intelligence and its impact on the future of business and IT. Decoding AI stems from our commitment to keeping up with the latest technological advancements. In monthly internal workshops, our team members share their experiences with different aspects of using AI in their daily work. We then condense that knowledge into helpful articles to share with you on our blog.
This month, our talented Python Developer, Dima Bohyński, wowed us by coding live and creating a cat image generator using GitHub Copilot. In this article, Dima will cover:
- An overview of GitHub Copilot key features.
- 3 best practices for maximizing GitHub Copilot's efficiency.
- A detailed, step-by-step case study demonstrating how to create your own cat image generator.
Ready to dive right in? Excellent! Let's hand it over to Dima!
What is GitHub Copilot?
GitHub Copilot is an AI pair programmer crafted to aid individual developers in their daily tasks by offering code suggestions, completing functions, identifying issues, and assisting them to debug code faster than ever. It harnesses an advanced artificial intelligence language model, Codex, developed by OpenAI. Leveraging GitHub's extensive dataset of open-source code as its training data, Copilot is proficient in virtually any programming language, including Python, JavaScript, Go, and C++.
GitHub Copilot stands out as an invaluable tool for both seasoned professionals and beginners due to its adaptive learning capabilities and comprehension of natural language prompts. It operates directly within the code editor, like Visual Studio Code, analyzes code in real-time, responds to queries, and delivers tailored recommendations.
It's essential to recognize that while Copilot is a powerful aid, the source of creativity and knowledge remains with you, not the AI. Initially, the AI lacks insight into your software development project, coding style, and objectives. Only through analyzing your code closely can it grasp your programming approach and offer meaningful suggestions. This enables you to shift focus from finer details to the broader scope, experiment with innovative solutions, and enhance workflow efficiency.
How It Works
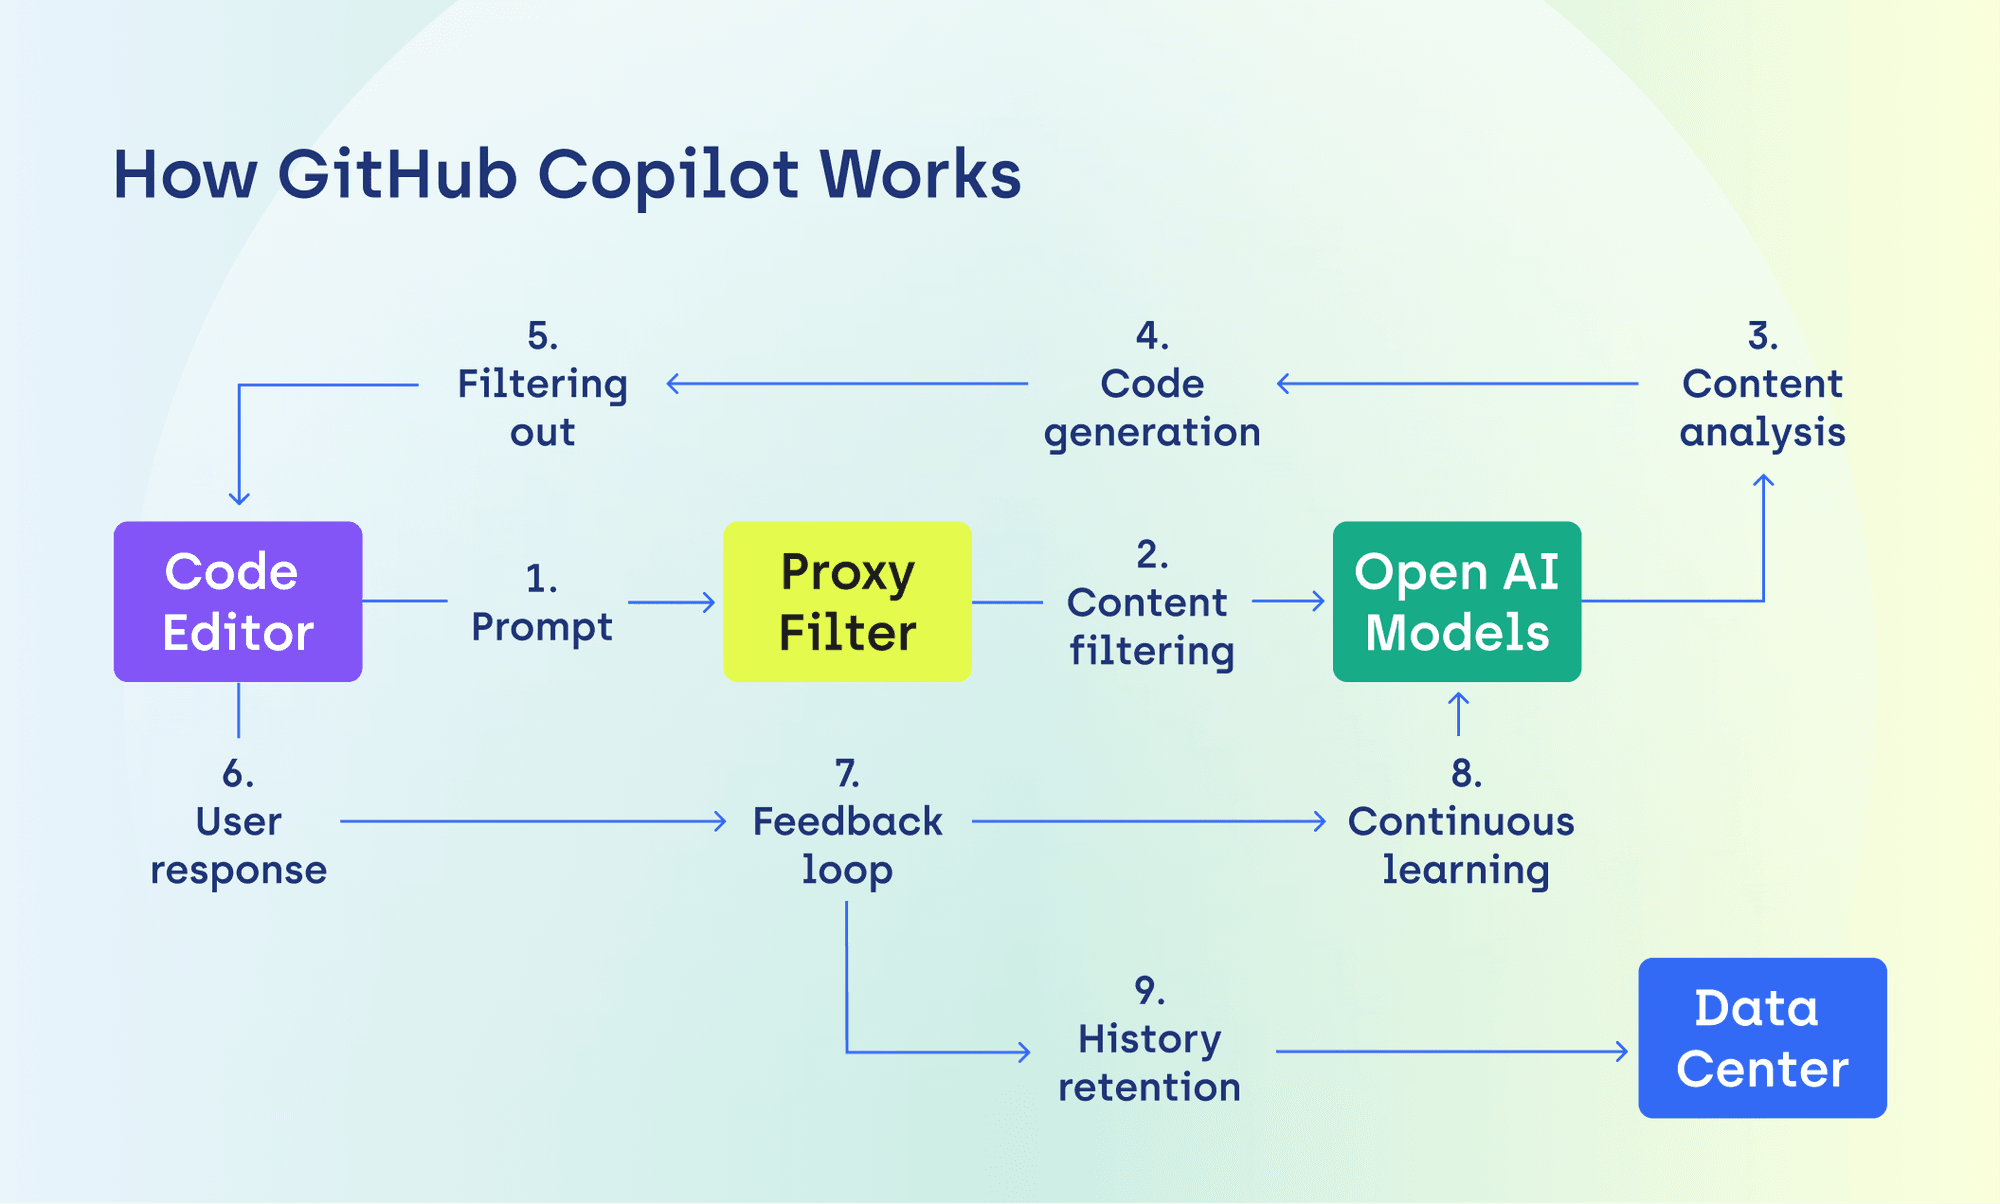
Source of information for the diagram: link.
When you input a prompt in the code editor (either as comments or via the GitHub Copilot Chat), the information travels securely via HTTPS to GitHub Copilot's servers. There, a proxy filter sifts through the data, removing any personal information and filtering out inappropriate content, like hate speech, offensive language, and other harmful material. Following this, Copilot analyzes keywords, phrases, and contextual clues to ensure it fully understands your prompt. The AI then translates your natural language request into actionable coding tasks and generates code customized to the project's language, framework, and your preferences.
In the blink of an eye, GitHub Copilot's code suggestion appears in the editor! Now, it's your turn to respond: you can accept it, make adjustments, or reject it completely, triggering a feedback loop. With each interaction, Copilot learns and stores the history of your prompts and responses in its data center.
Pricing And Installment
GitHub Copilot offers two primary payment plans: individual (monthly or yearly billing) and business (monthly billing per Copilot seat). Additionally, it's free for verified students, teachers, and maintainers of popular open-source repositories on GitHub. Detailed instructions on installing the GitHub Copilot extension in Visual Studio Code can be found here.
GitHub Copilot's Key Features
Autofill Suggestions
The important thing to remember with Copilot's intuitive autofill suggestions is that AI's accuracy improves over time as it learns your programming style and adapts to your needs. This feature excels in handling repetitive code and filling out established patterns. To maximize its utility, start by writing functions yourself and use Copilot for assistance instead of relying solely on it.
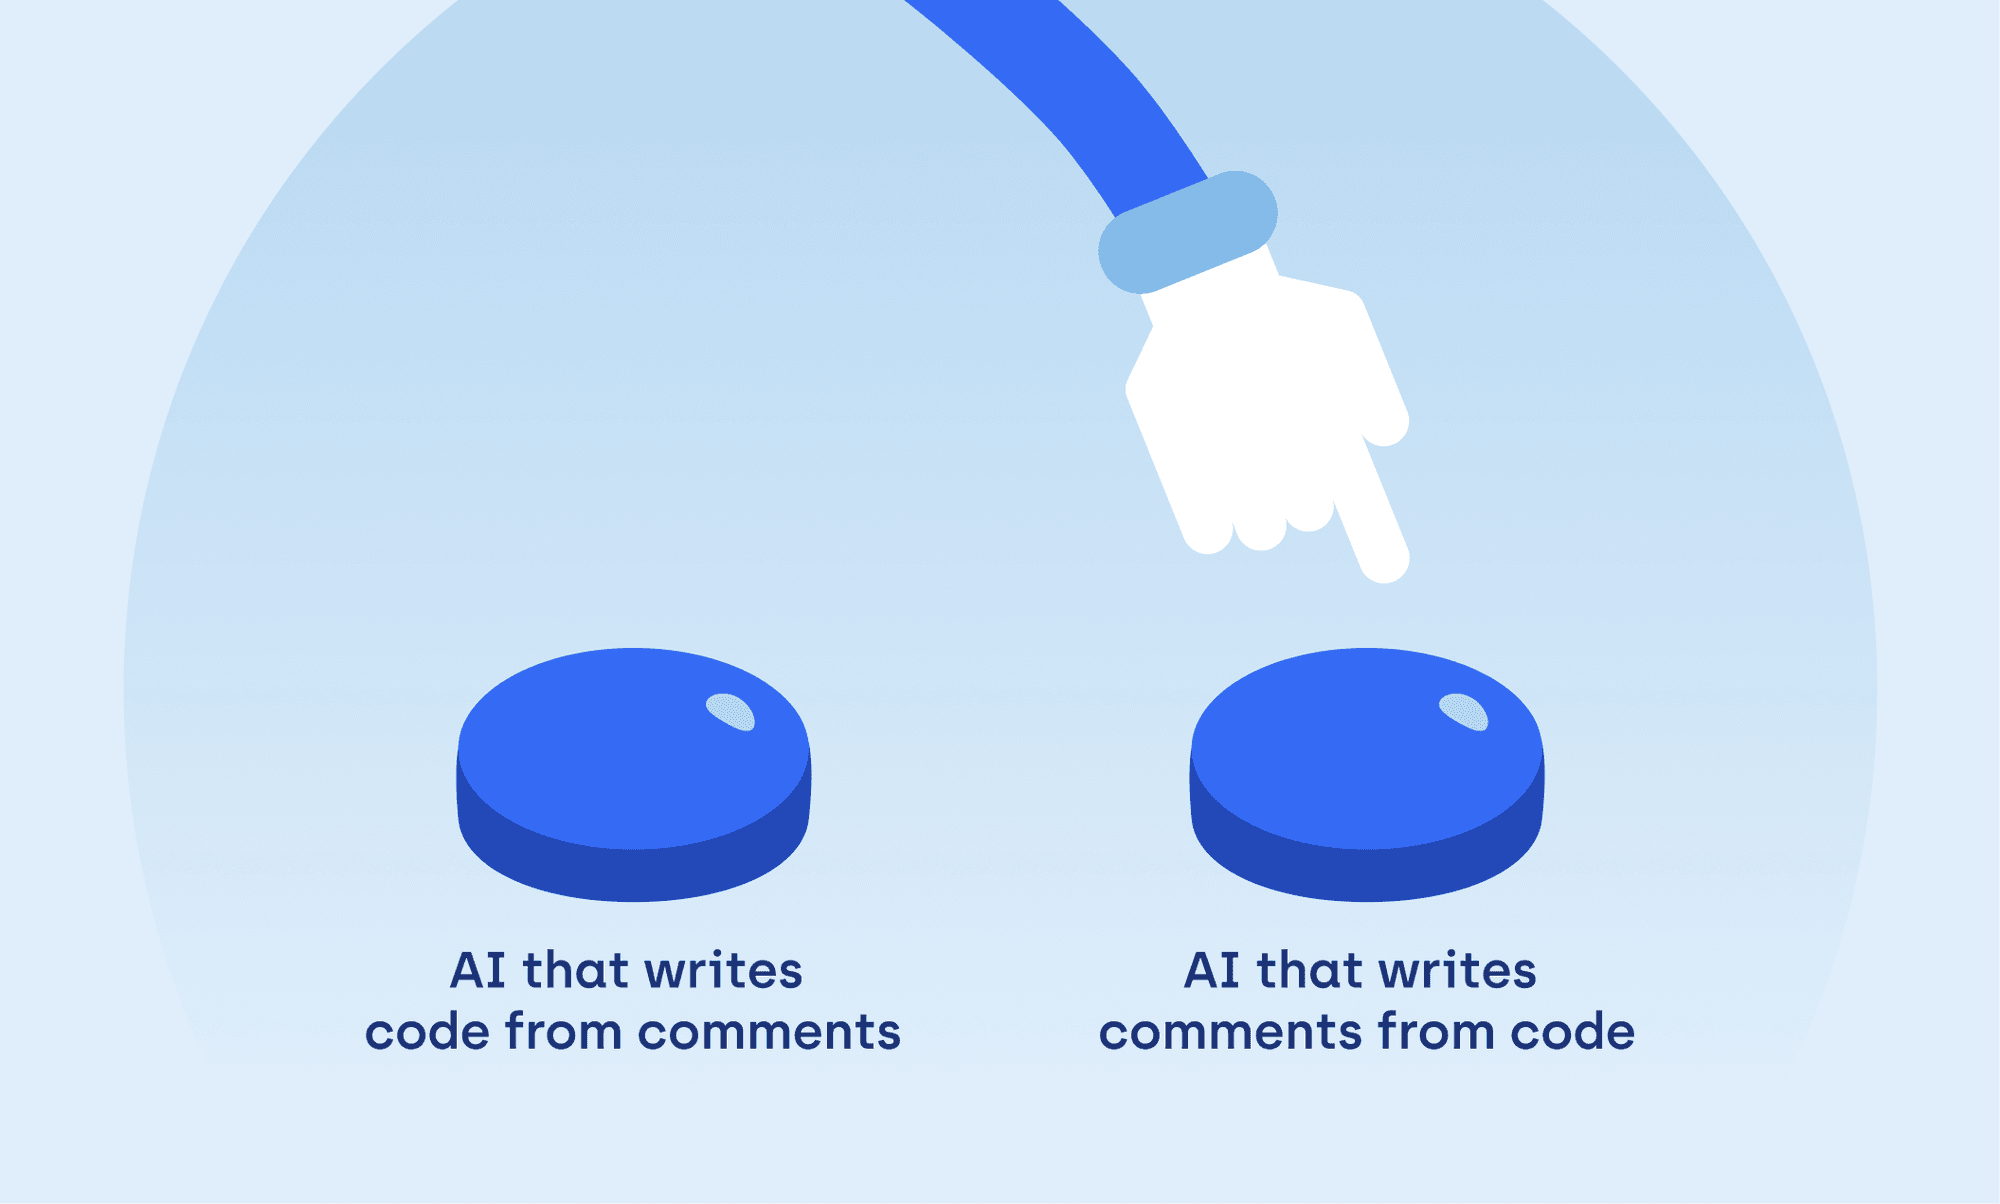
Code Generating Based on Comments
Additionally, GitHub Copilot can generate code snippets or entire functions based on comments. All you need to do is simply describe the desired outcome in natural language. However, to leverage this feature effectively, ensure your comments are precise and clear. Writing detailed comments can be challenging to master, so I recommend using AI to generate comments from code rather than the reverse. This code generation feature proves useful in projects with extensive code repositories for AI to analyze, or when tackling common challenges.
Programming Language Translation
As I mentioned before, GitHub Copilot is versatile in its ability to write code in virtually any programming language. This makes it an ideal tool for translating code across different languages, particularly in projects involving multiple programming languages.
Debugging and Cleaning Code
As you work on your code, GitHub Copilot analyzes it, identifies issues, and offers solutions for improvement. Essentially, this AI tool saves you time spent on debugging, the less thrilling part of coding. It can also optimize code, making it more robust, readable, or logical.
Unit Tests
GitHub Copilot generates unit tests based on provided code to verify if a function behaves as expected under various conditions. It can comprehend the function or method being tested, create basic templates for unit tests, and suggest test cases for different scenarios.
GitHub Copilot Chat
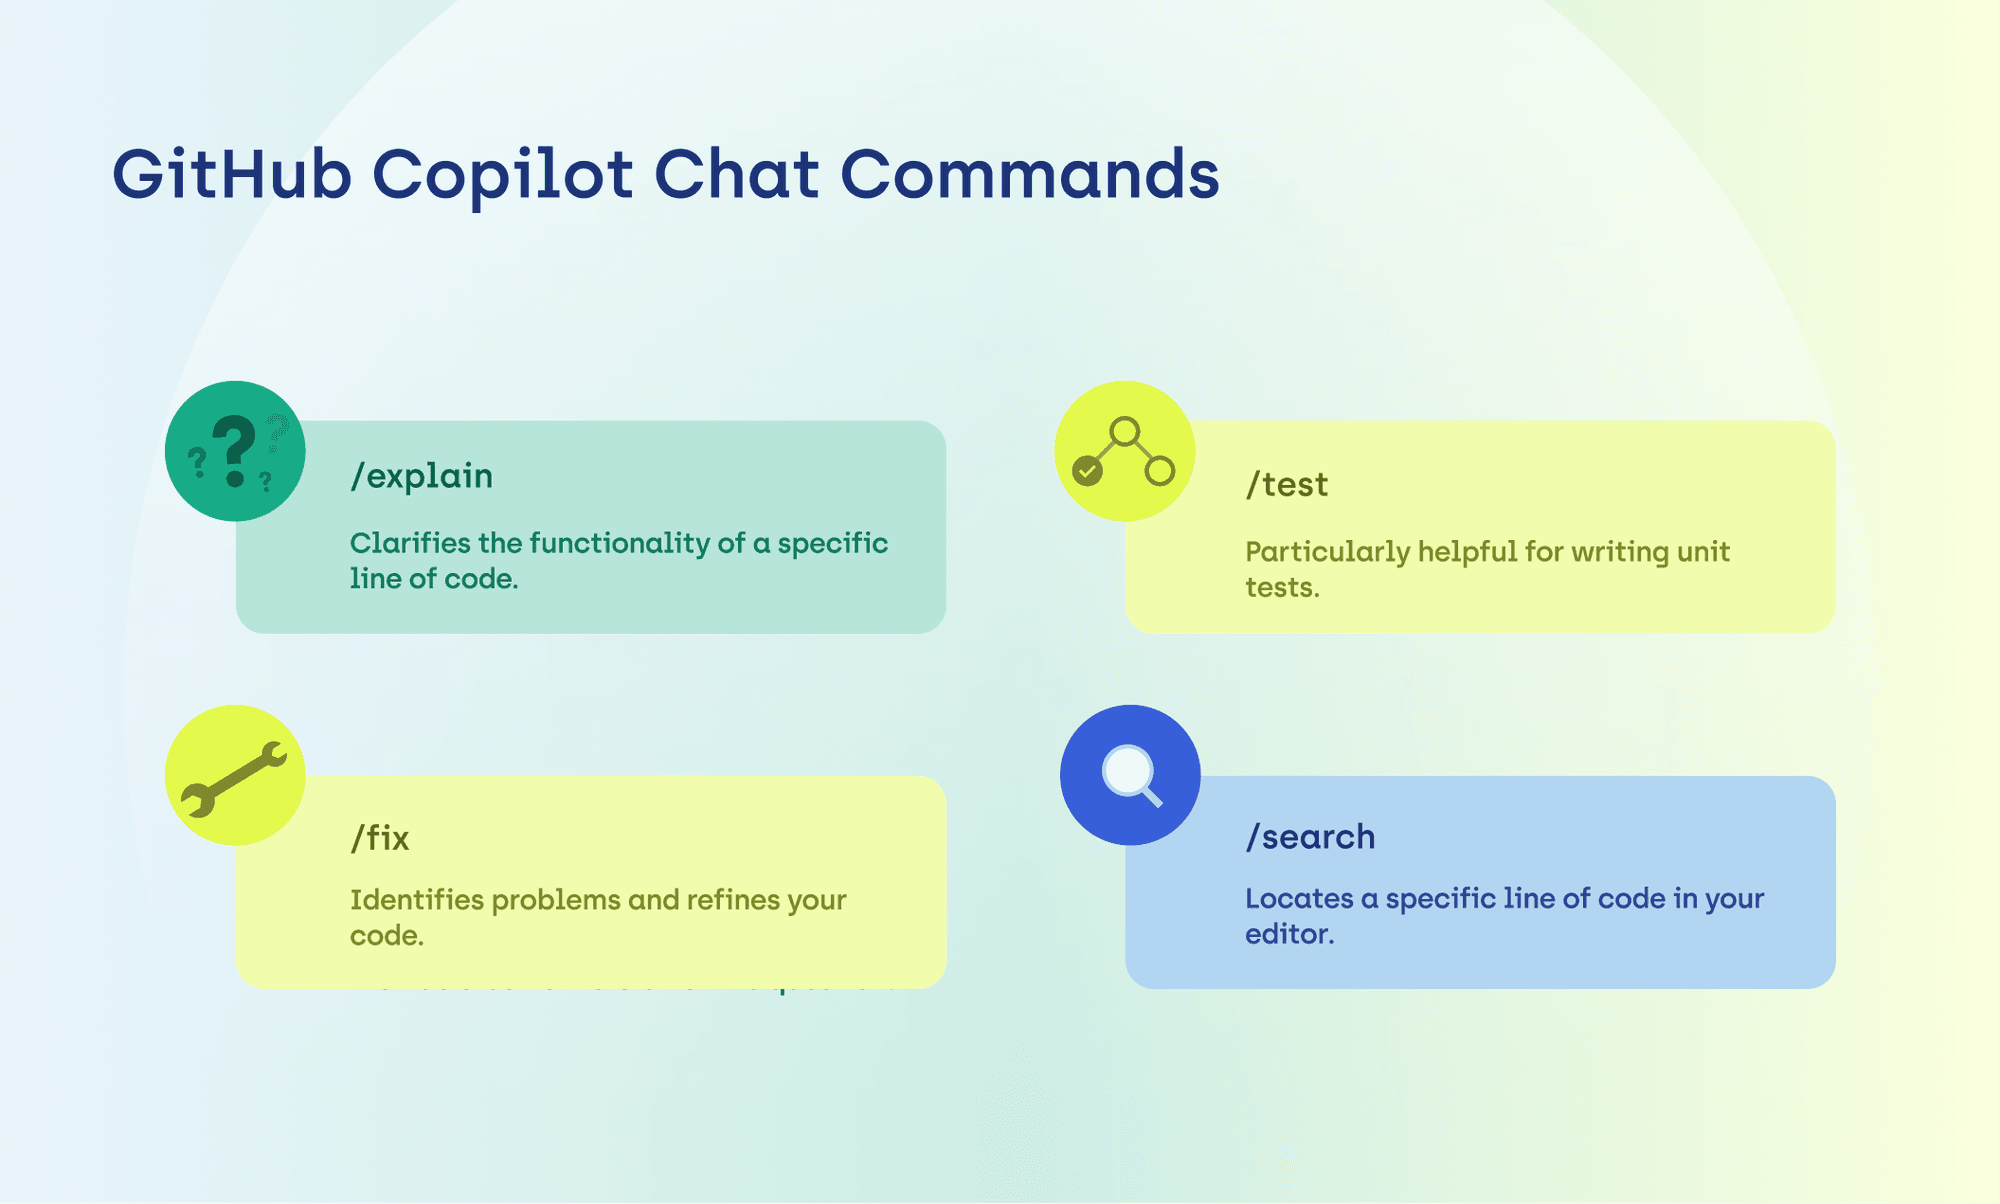
You can interact with the AI assistant in the GitHub Copilot chat. Simply click the Copilot icon on the Visual Studio Code activity bar or press Command + I to open the chat. From there, you can ask questions in natural language. Additionally, useful commands appear in the chat window after pressing a slash:
- /explain: Clarifies the functionality of a specific line of code.
- /test: Particularly helpful for writing unit tests.
- /fix: Identifies problems and refines your code.
- /search: Locates a specific line of code in your editor. Note that the name after @ (e.g., @workspace) specifies the search area.
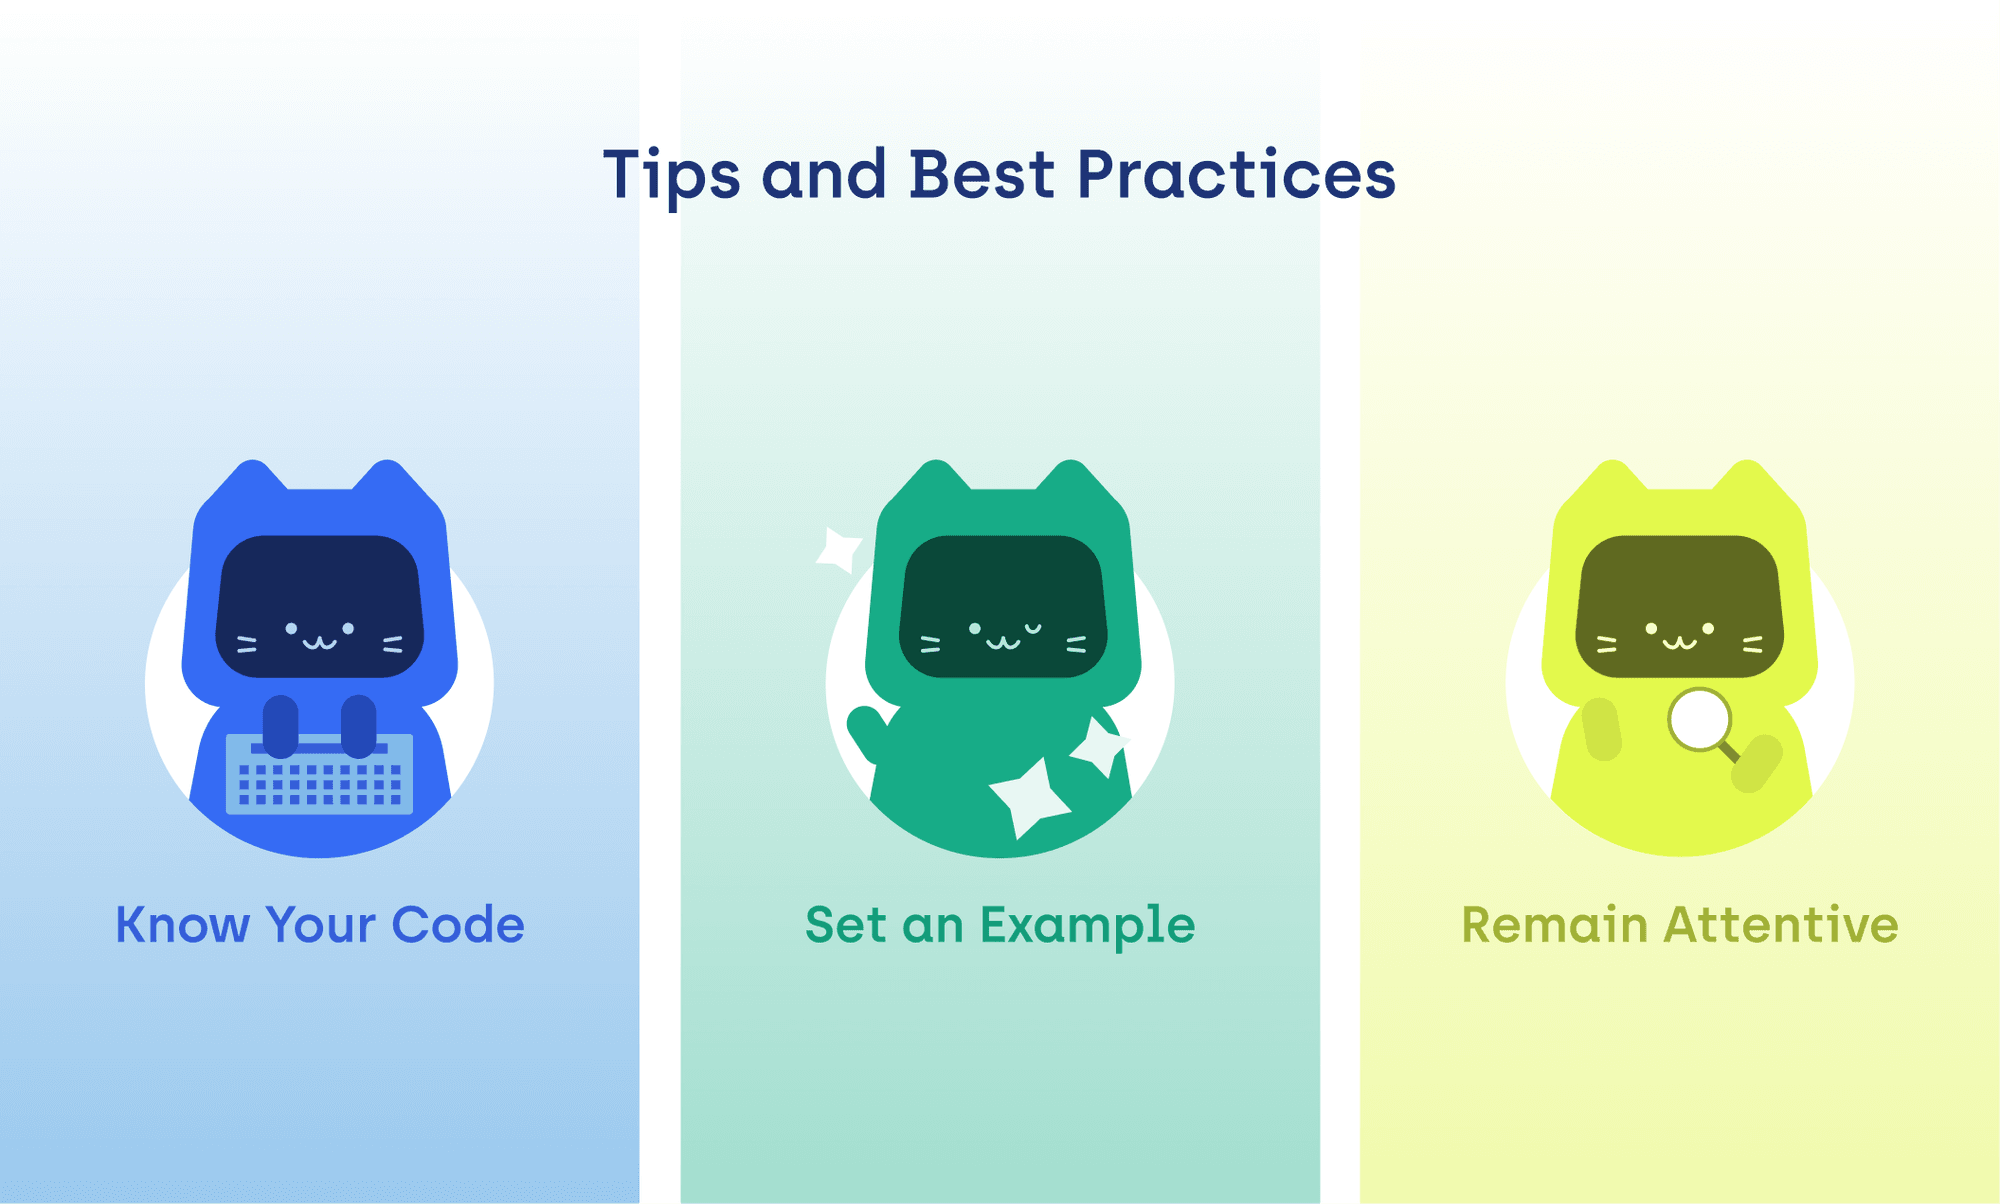
Tips and Best Practices for Maximizing GitHub Copilot's Efficiency
GitHub Copilot is an invaluable tool that can significantly speed up and ease programming tasks. Yet, to fully leverage its capabilities, developers should adhere to certain guidelines that help steer AI in the right direction. Here are three best practices for maximizing the benefits of GitHub Copilot.
Know Your Code
While GitHub Copilot caters to developers on all levels, it shines brightest in the hands of seasoned programmers. You mast act as the primary source of creativity, maintaining the overarching vision, while also taking on the role of a judge, evaluating the final output. Initially, the AI's suggestions may not meet your expectations until it familiarizes itself with your coding style and preferences.
- Avoid blindly copying code without grasping its implications and functions.
- Review code snippets generated by AI to ensure they are free of errors and compliant with your standards.
- Craft clear, concise commands that precisely describe the desired outcome.
Set an Example
Dynamic and flexible, GitHub Copilot evolves alongside the user's coding style. A proven tactic for enhancing the quality and relevance of generated code is to provide AI with examples. The more diverse and representative the dataset, the better GitHub Copilot can assist you with accurate code suggestions.
- Illustrate your expectations for the AI assistant through concrete examples.
- Provide a broad spectrum of examples to enhance accuracy and relevance.
- Establish a code repository on GitHub to facilitate seamless collaboration with Copilot.
Remain Attentive
It's essential to recognize that GitHub Copilot doesn't guarantee flawless adherence to best practices and security standards. AI learns from an extensive database of publicly available code, leaving room for potential vulnerabilities. GitHub Copilot users must remain vigilant regarding common vulnerable coding patterns, data privacy concerns, and other risks.
- Double-check your code, comments and documentation.
- Adhere to your company's coding standards and security guidelines.
- Report any security-related issues to both your employer and GitHub Copilot.
From Code to Cats: A Case Study
Let's put our theoretical knowledge to work! In this part, I'll demonstrate how to create a full project using GitHub Copilot, incorporating tips and best practices we've learned earlier. To help you dive in with the GitHub Copilot extension, I've crafted a fun and simple example: a cat image generator! The idea behind the app is to harnesses cloud technology and Artificial Intelligence to craft unique cat images based on certain specifications.
Structure
Our application is divided into two key sections: infrastructure (cloud setup) and business logic (image generation). Here's the breakdown of the directory structure:
./cat_pictures_generator_api
├── README.md
├── __init__.py
├── requirements-aws.txt
├── serverless.yml
└── src
    ├── __init__.py
    ├── apis.py
    ├── cat.py
    ├── cats.py
    └── image_generator.py
Components
Within this structure, we can identify four main components:
- apis.py: This file hosts a straightforward Lambda function responsible for generating cat images according to user-specified cat types. The Lambda handler employs the aws_lambda_powertools library to manage HTTP requests efficiently.
- cat.py: Here, we define a foundational class called CatBase, housing essential cat attributes like size, color, eye color, and breed.
- cats.py: This module contains classes that inherit from CatBase, along with the get_cat function, which returns the relevant object based on the cat's alias.
- image_generator.py: This file handles integration with the OpenAI API, enabling image generation based on the cat object's attributes.
Prerequisites
Before diving into development, ensure you have the following tools installed and set up:
- Node.js and npm (Node Package Manager).
- Serverless Framework: You can install it globally via npm using the npm install -g serverless command.
- Configured access credentials for your chosen cloud platform (e.g., AWS).
GitHub Copilot in Action
This is where GitHub Copilot truly shines: crafting new objects and writing unit tests. Through these two examples, I'll demonstrate the practical usage of Copilot's key functions and underscore the importance of adhering to best practices in achieving desired results.
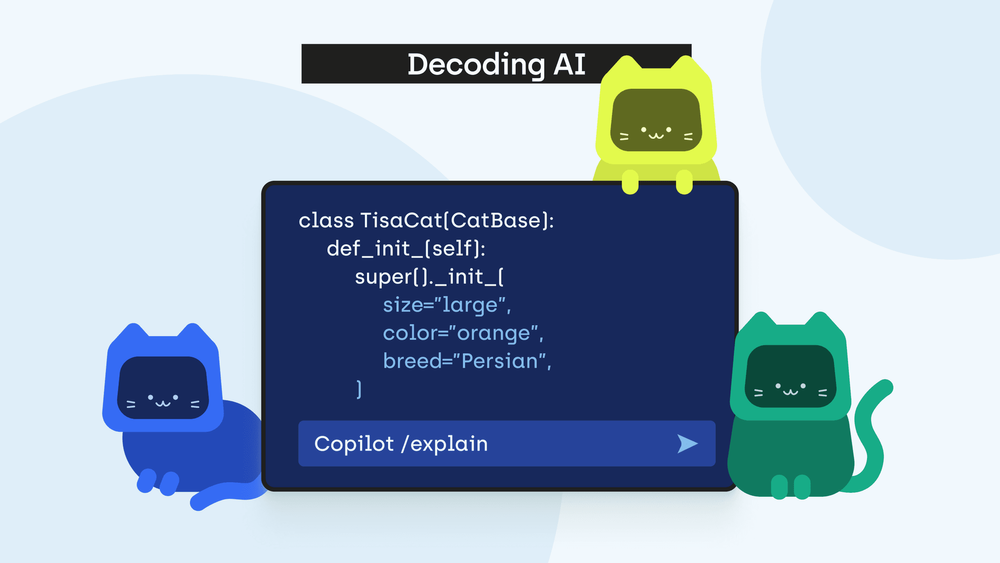
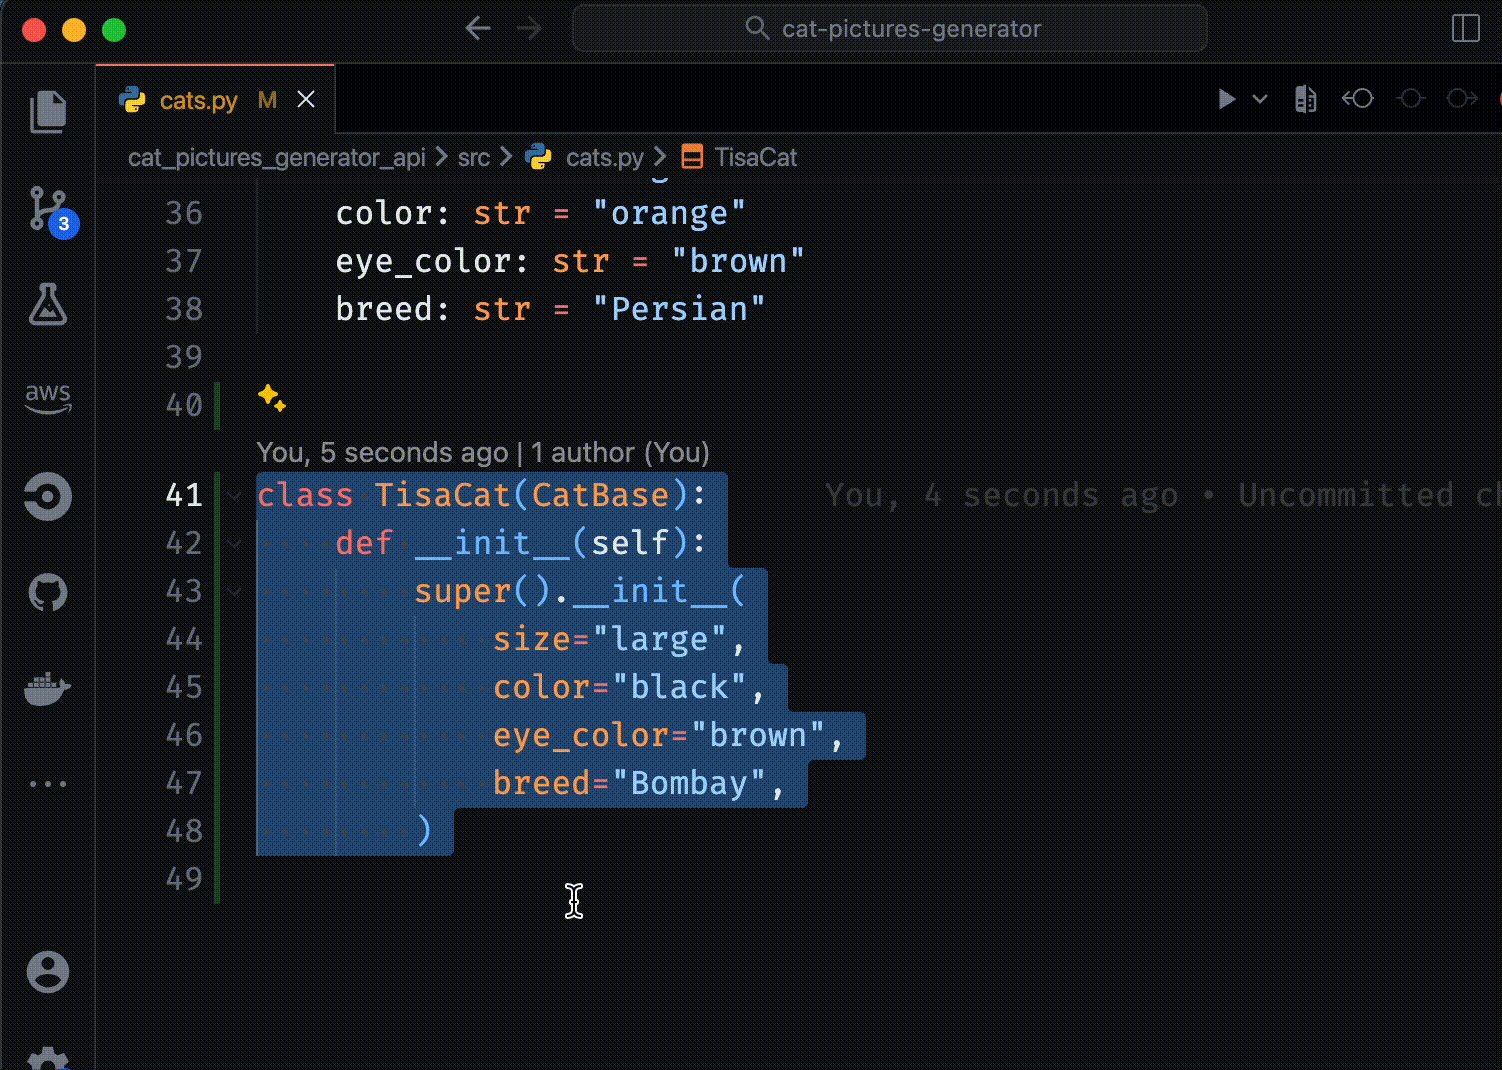
Creating a TisaCat Object
Previously, I defined the foundational class, CatBase, along with its attributes:
@dataclass(frozen=True, eq=True)
class CatBase:
	size: Literal["small", "medium", "large"]
	color: Literal["white", "black", "orange", "green"]
	eye_color: Literal["blue", "brown"]
	breed: Literal["Persian", "Bombay", "Chartreux"]
My task for GitHub Copilot was to generate a new TisaCat class that inherits from CatBase and incorporate specific properties and methods for this cat breed. Upon entering 'class TisaCat(CatBase)' in the code editor, Copilot swiftly suggested the following attributes using its autofill feature:

It's safe to assume that if it wasn't for pre-established inheriting classes like MyCat, FianceeCat, and Garfield, the AI would probably struggle with providing relevant suggestions. Nonetheless, Copilot's selections for the cat's size, color, and breed might leave you puzzled. Luckily, by accessing the GitHub Copilot Chat and entering the /explain command, you can request a clarification. Here's the explanation my AI assistant provided regarding the TisaCat object:
The last step involved crafting appropriate documentation for the newly formed class. Once more, I accessed the Copilot chat and entered '/fix please help me create documentation for my class'. In a matter of seconds, the AI generated a detailed description of the TisaCat class. Following this, I carefully reviewed the documentation to confirm it aligned with my standards of clarity and comprehensiveness.
Key Takeaways
- Provide Context: I commenced by clearly delineating the purpose and unique characteristics of a 'TisaCat' within the framework of the generic 'CatBase' interface.
- Offer Examples for Copilot: By providing code examples for analogous classes that already exist in the system, I facilitated Copilot's comprehension of the anticipated style and structure.
- Verify Documentation: I meticulously assessed the documentation, ensuring it's up to my personal standards and would be easily understood by fellow developers.
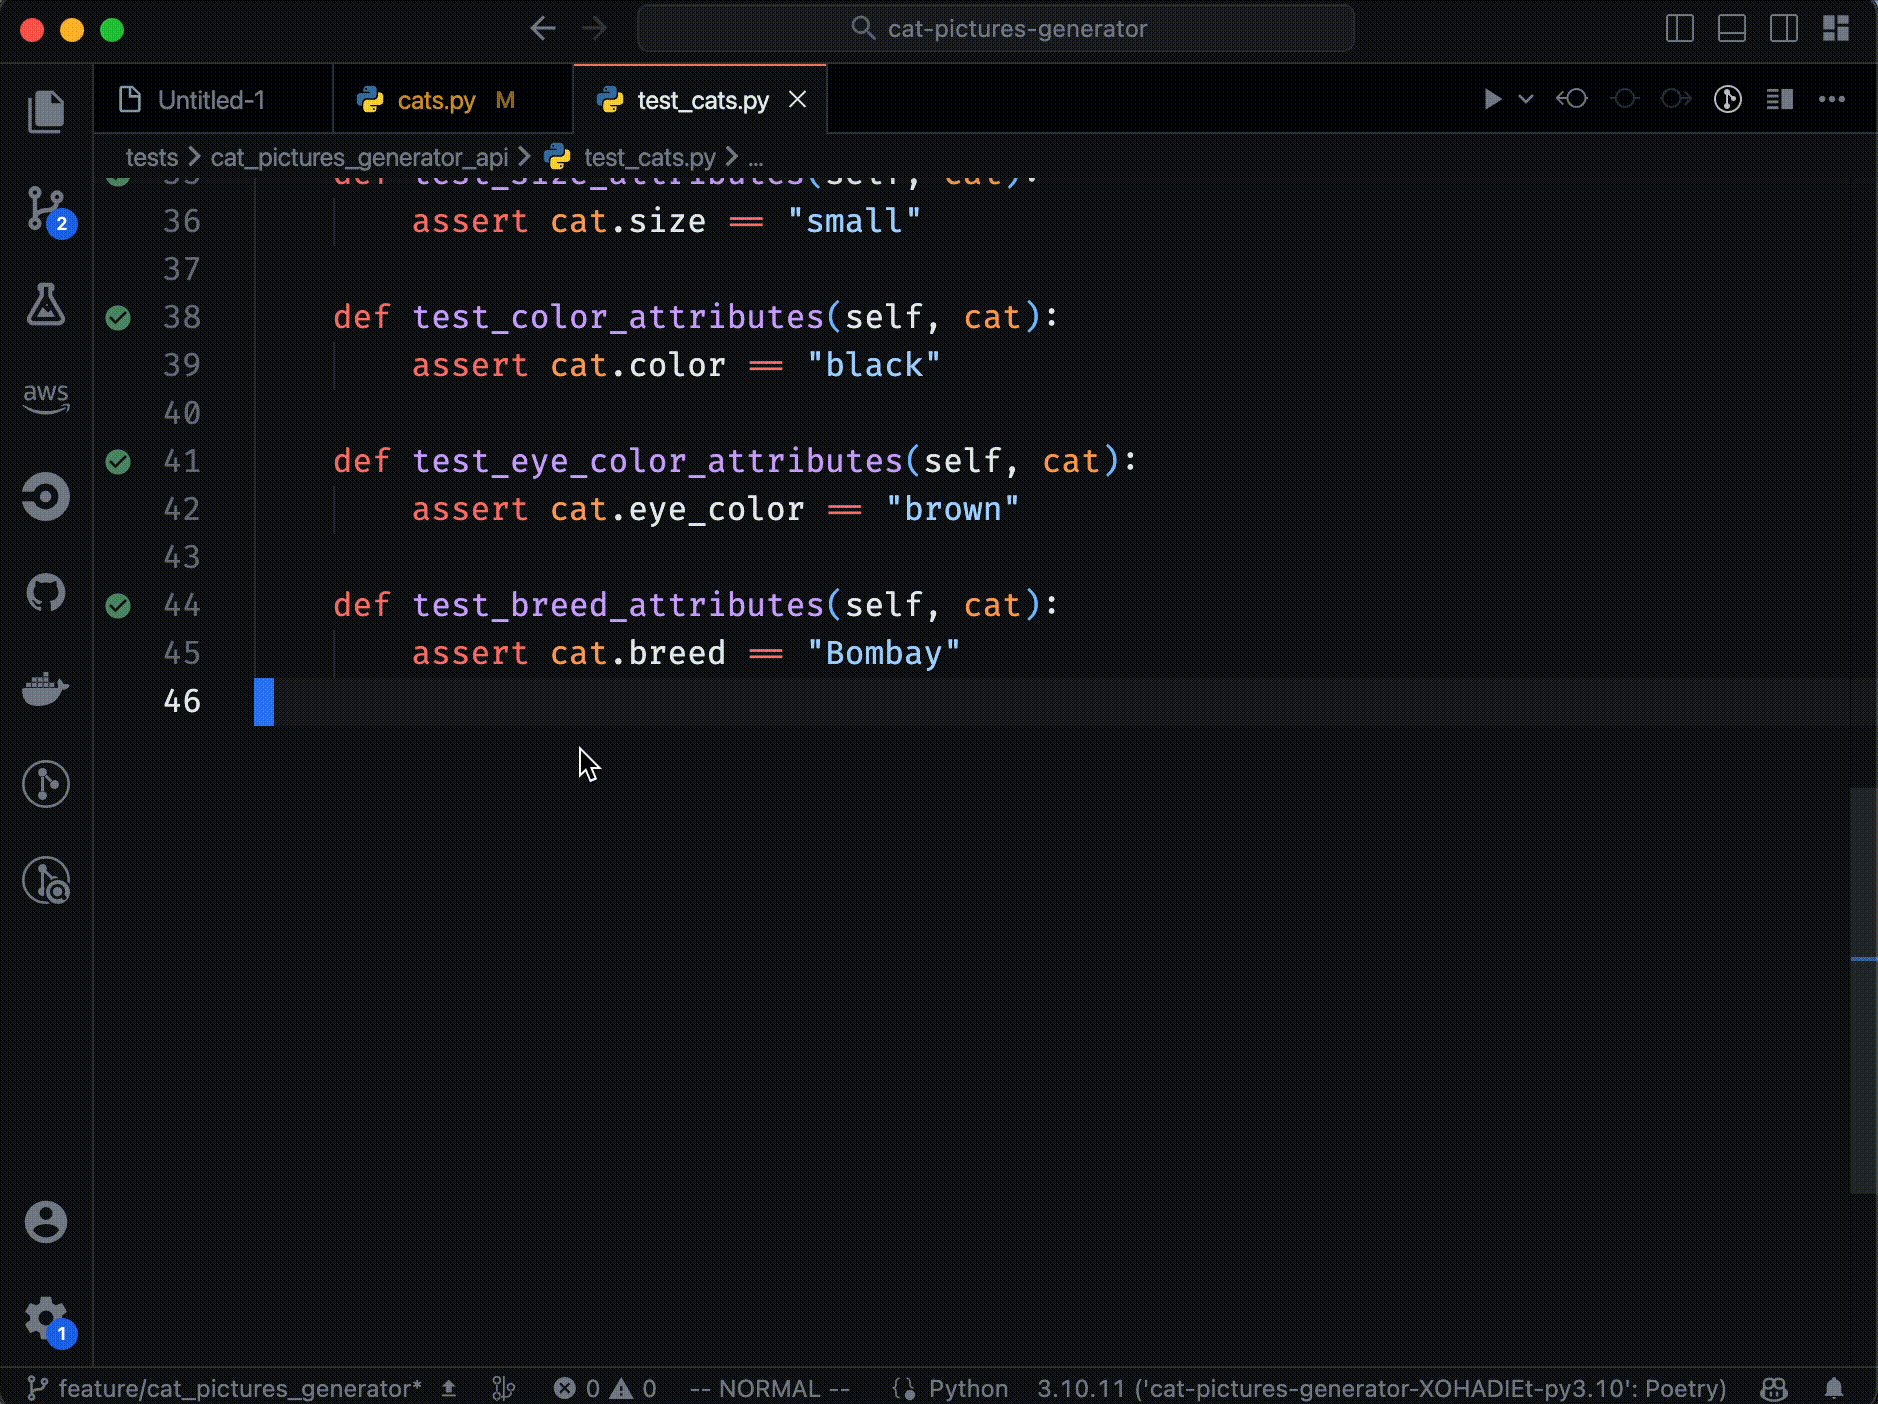
Writing Unit Tests
Here, I took the opportunity to show you the significant contrast between giving GitHub Copilot a single example of a unit test and providing none.
Version 1: Without Example
I aimed to test GitHub Copilot's ability to create unit tests for TisaCat without any prior examples or specific instructions. The goal was to assess whether the tool could grasp the context independently and offer helpful suggestions.
Unfortunately, Copilot generated code that didn't meet my requirements. It proposed solutions based on default assumptions, often straying from my project's actual needs. This situation underscores the importance of offering precise instructions to AI tools, either in the form of sample code or clear and concise commands. It also highlights the limitations of AI tools in understanding context without explicit guidance.
Version 2: With Example
After the first failed attempt, I decided to provide it with a sample unit test. This simple action helped the tool better comprehend the expected results and test structure, leading to the generation of more relevant and useful suggestions for the TisaCat object.
Deployment
Configuration with Serverless Framework
Before deployment, complete the configuration process in these 2 steps:
- serverless.yml: This file houses all the necessary configuration for deploying your application to the cloud. Customize it according to your cloud provider, desired features, triggering events, and more.
- requirements-aws.txt: Here, you'll find a list of Python dependencies crucial for your application's functionality. Ensure all required packages are included in this file.
Deployment Process
Ready to launch your application using Serverless Framework? Just breeze through these 5 simple steps:
- Begin by opening your terminal and navigating to the root directory of your application (./cat_pictures_generator_api).
- If you're using a Python virtual environment, don't forget to activate it. This step ensures that all Python dependencies are installed and neatly isolated.
- Now, install the Python dependencies listed in requirements-aws.txt using this command:
pip install -r requirements-aws.txt
4. Log in to your cloud provider and double-check that your credentials are all set for Serverless Framework. For AWS, a quick configuration via AWS CLI with the aws configure command should do the trick.
5. Last but not least, deploy your application with a swift command:
serverless deploy
This command reads the configuration from serverless.yml, wraps up your application and its dependencies, and deploys them to the cloud platform of your choice.
Upon successful deployment, Serverless Framework will display the URL of your freshly generated API endpoint, which you can use to interact with your application and explore its capabilities.
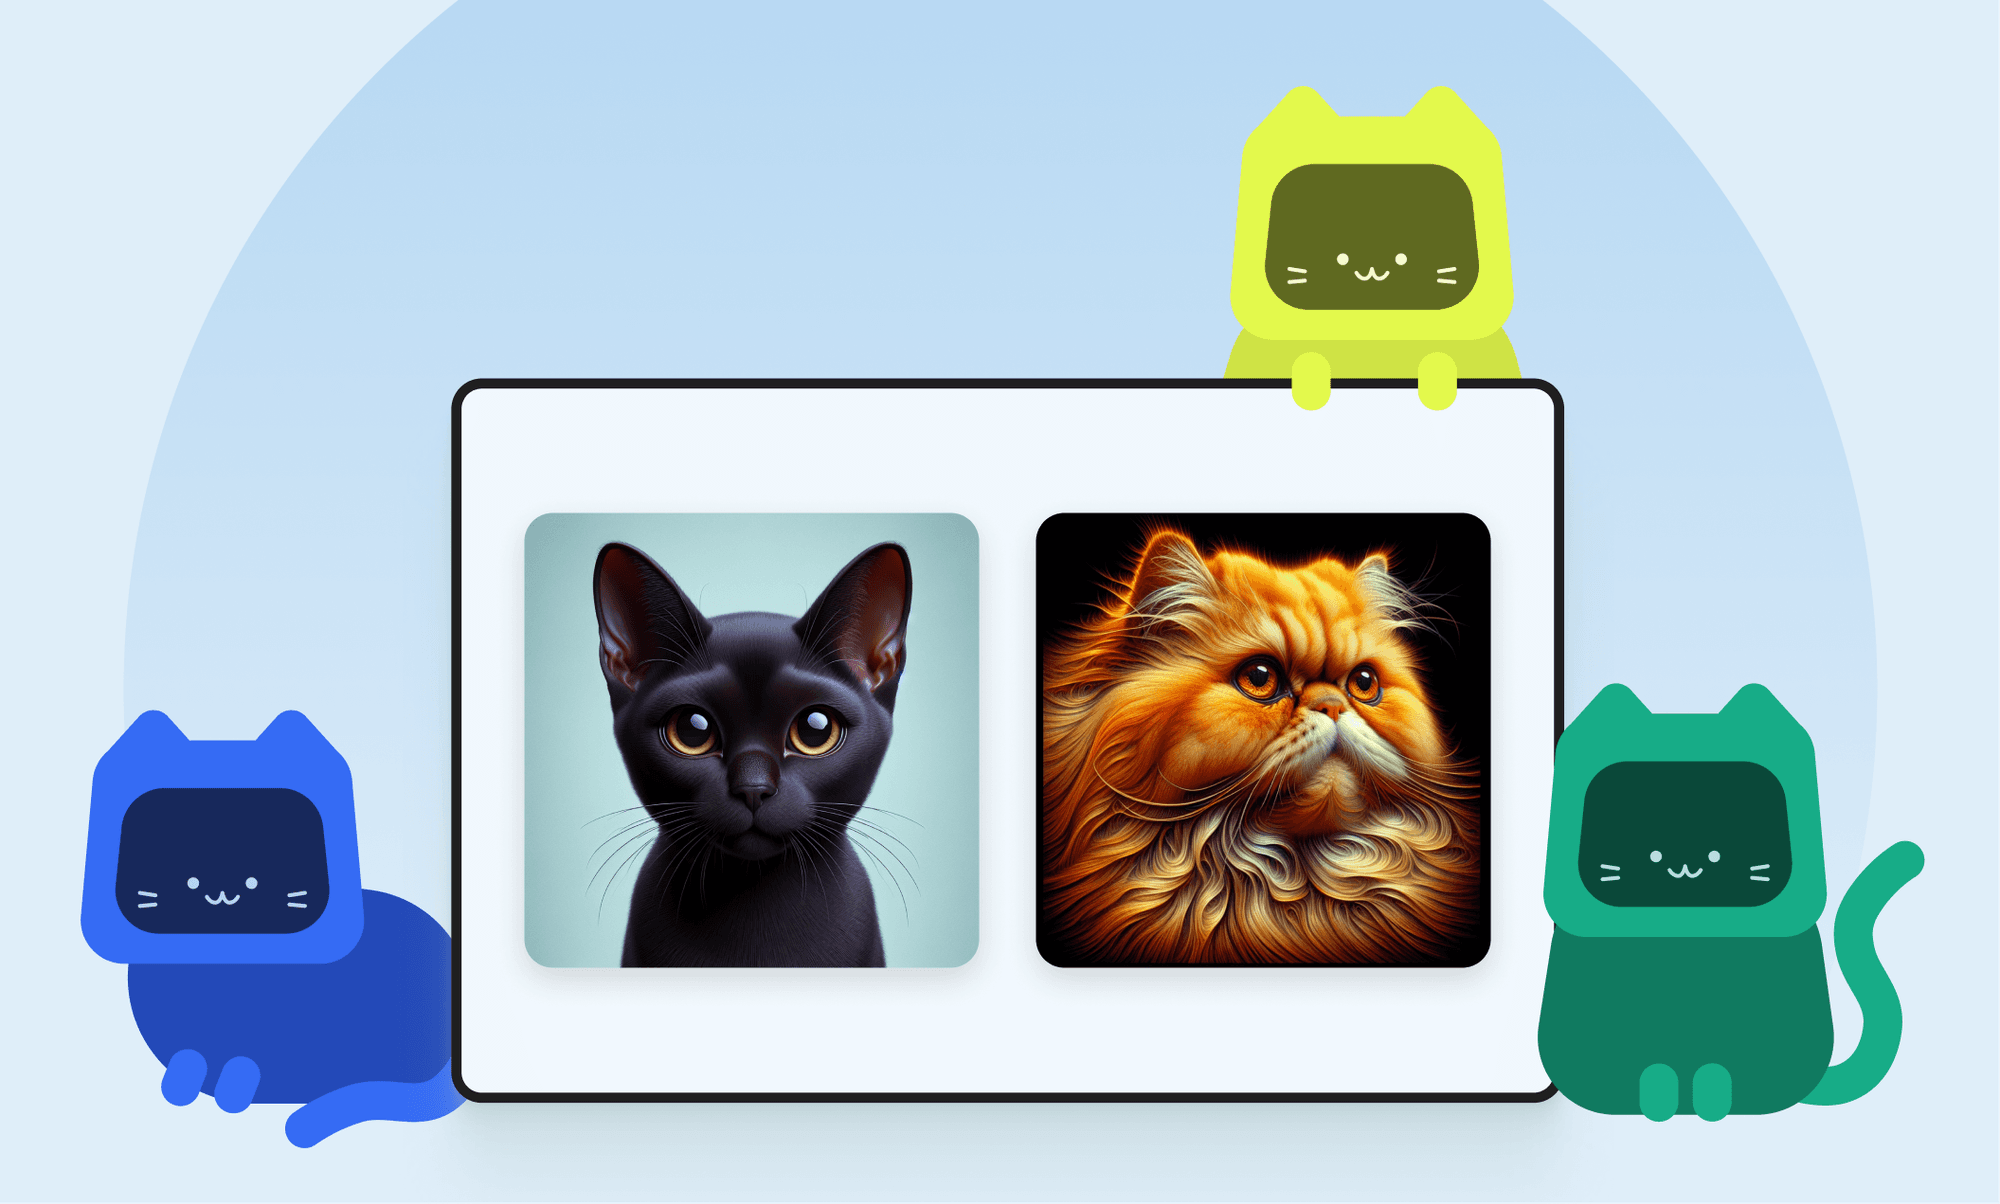
Verification
To ensure everything's running smoothly, test the generated API endpoint using a versatile tool like Postman or simply pop the endpoint URL into your browser. After specifying the type of cat via the / endpoint, the app will deliver the highly anticipated cat image.
Drumroll, please! I present to you the final product of my cat image generator app:
Final Thoughts
The aim of my Decoding AI presentation, and subsequently this article, was to offer a starting point for developers new to using AI in their daily tasks. Instead of delving into every GitHub Copilot function, my aim was to share insights, tips, and best practices to enhance your use of this tool. Through detailing my experience developing a cat image generator, my hope is to encourage you to explore GitHub Copilot in your own projects. Wishing you the best of luck!
More Articles From the Decoding AI Series
Need expert assistance with your digital project?
Recent from Dmytro Bohynskyi
You may also like